Whether you've spotted a cracked tile after a storm, noticed a leak in your ceiling, or found a tile that's slipped out of place, knowing how to remove roof tiles safely can help you address minor roofing issues quickly. This Australian guide covers everything you need to know about roof tile removal, from the right tools to proper techniques for lifting roof tiles without causing damage.
However, working at height carries serious risks. If you're dealing with a steep roof, extensive damage, or feel uncertain about the process, it's always safest to hire a licensed roofing professional.
Quick Answer (TL;DR)
How to remove roof tiles: Use proper safety equipment, lift overlapping tiles with a timber wedge or roof tile removal tool, carefully disengage the target tile with a pry bar, then slide it up and out. Biggest risks: Falls from height and breaking adjacent tiles.
Not recommended for: Steep roofs, second-storey work, or fragile terracotta tiles. Book a professional repair if you're unsure about removing roof tiles yourself.
Before you start: Safety and legal considerations
⚠️ Safety First
Roof work is inherently dangerous. According to Safe Work Australia, falls from roofs are a leading cause of workplace fatalities. If your roof is steep (over 20°), you're working on a second storey, or you have any doubts, contact a licensed roofing contractor.
Before attempting any roof work, you'll need proper personal protective equipment (PPE):
- Non-slip shoes with good grip (never work in thongs or smooth-soled shoes)
- Work gloves to protect your hands from sharp edges
- Eye protection to guard against debris
- Long sleeves and pants to protect against scrapes
Weather conditions matter: Only work in dry, calm conditions. Wet tiles become extremely slippery, and wind can make balancing difficult. Check your ladder is properly secured and ideally have a helper present to spot you.
Warranty and insurance considerations: Check if your roof is still under warranty, as DIY repairs might void coverage. Some insurance policies also require professional repairs for claims.
Roof Tile Removal Tools You'll Need
Having the right roof tile removal tool makes the job safer and easier. Gather these tools before you start removing roof tiles:
- Safety ladder (extend 1 metre above roof line)
- Roof anchor and rope for steep roofs
- Flat pry bar (about 30cm long) – the essential roof tile removal tool
- Timber wedge (for lifting roof tiles without damage)
- Tile lifting tool (optional but helpful for how to lift roof tiles safely)
- Replacement tile (ensure it matches profile and colour)
- Bucket for collecting debris
- Soft brush for cleaning
- Silicone sealant or compatible clips (if required for your tile type)
Important note for Australian homeowners: Different tile types behave differently. Concrete tiles are generally more robust than terracotta, but both require careful handling to avoid breaking adjacent tiles when removing roof tiles.
Identify your tile type and fixing method
Before removing any tile, you need to understand what you're working with:
Tile types:
- Interlocking concrete tiles: Most common in modern homes, designed to hook together
- Terracotta tiles: More fragile, often found on older homes
- Valley tiles: Special shaped tiles at roof valleys that may require different techniques
Fixing methods:
- Interlocking only: Tiles hook together with nibs and lugs
- Nailed or screwed: Additional fixings secure tiles to battens
- Clipped: Metal clips provide extra security in high-wind areas
Step-by-Step: How to Remove Roof Tiles in Australia
Follow these steps for safe roof tile removal. This process applies to most Australian homes with concrete or terracotta tiles.
Step 1: Safe roof access
Position your ladder at a 75° angle (4:1 ratio) and ensure it's on stable, level ground. Climb carefully, maintaining three points of contact. Once on the roof, always step on the ribs near the battens, never in the middle of tile pans where they're most likely to break.
Step 2: Distribute your weight
Move carefully across the roof, distributing your weight across the supporting structure. If you're working on a steep roof, use a roof anchor and safety rope attached to a secure point.
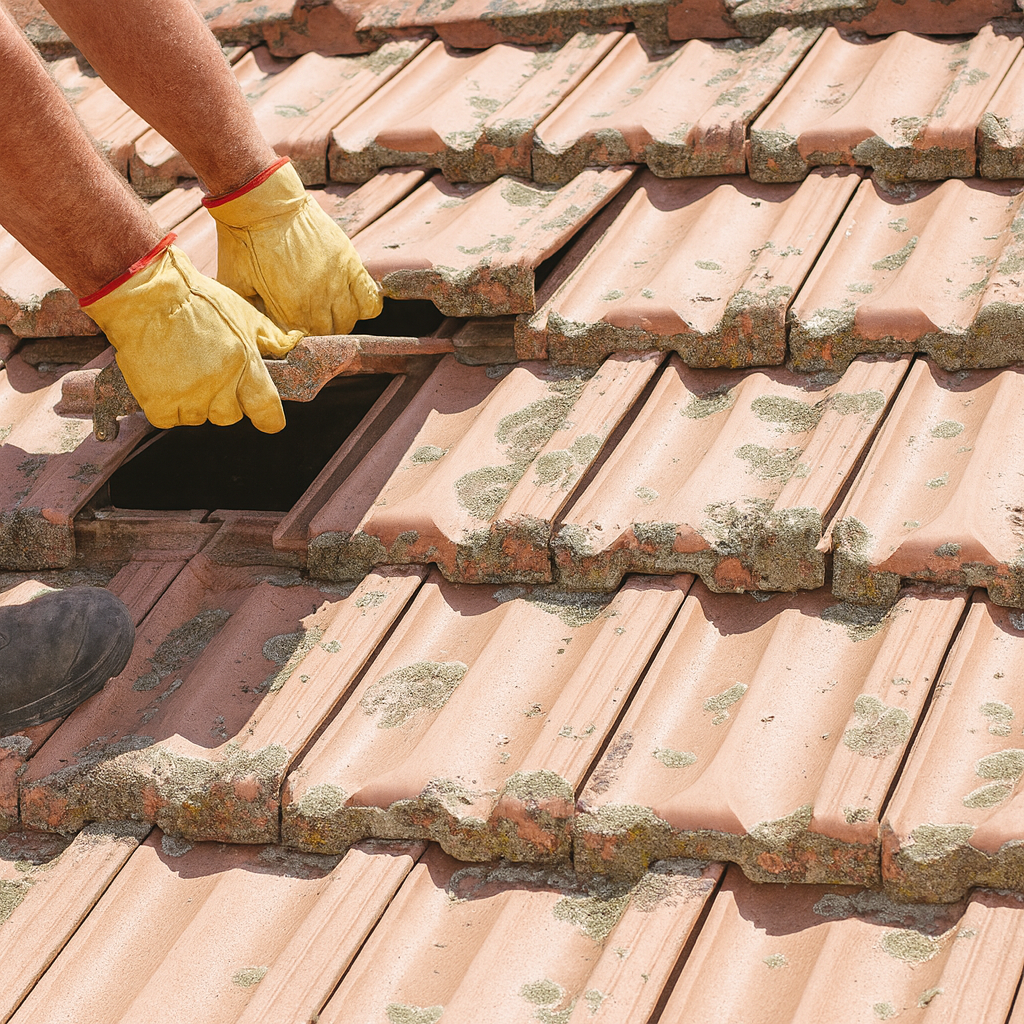
Step 3: Lifting roof tiles (the overlapping ones)
Understanding how to lift roof tiles properly is crucial. Use your timber wedge to carefully lift the tiles that overlap your target tile. This typically means lifting roof tiles directly above and possibly those to the sides, depending on your tile pattern. Be gentle – you don't want to crack these tiles in the process.
Step 4: Free the target tile
With the overlapping tiles lifted, use your flat pry bar to carefully disengage the target tile from its fixings. For interlocking tiles, you may need to lift the tile slightly and slide it towards the ridge to disengage the nibs. For nailed or clipped tiles, you'll need to work around these fixings without damaging adjacent tiles.
Step 5: Remove the tile
Once disengaged, slide the tile up towards the ridge and lift it out carefully. This is the key moment when removing roof tiles – avoid excessive leverage on the batten underneath, as damaged battens require professional repair.
Step 6: Clean and inspect
Clear any debris from the area and inspect the batten and surrounding tiles for damage. Check that water hasn't caused any rot or deterioration to the underlying structure.
Step 7: Temporary weather protection
If rain is threatening and you can't immediately install a replacement, cover the opening with a tarp secured with weights (not nails or screws that could damage the roof).
How to Replace Roof Tiles in Australia
Once you've successfully completed the roof tile removal, replacing roof tiles is essentially the reverse of the removal process. Here's how to replace roof tiles in Australian homes:
- Position the tile: Slide it into place, ensuring the nibs locate properly on the batten
- Engage the interlock: Make sure the tile hooks properly with adjacent tiles
- Re-attach fixings: Replace any clips or screws that were removed
- Check alignment: Ensure the tile sits flush with surrounding courses
- Seal only if necessary: Most modern tiles don't require additional sealing, and over-sealing can block drainage paths
Common Mistakes When Removing Roof Tiles
Avoid these common errors when removing roof tiles or lifting roof tiles:
- Over-sealing: Blocking natural drainage can cause water to back up and find new leak paths
- Walking on tile pans: Always step on ribs near battens to avoid breaking tiles
- Breaking tile nibs: Be gentle when disengaging interlocking mechanisms – use a proper roof tile removal tool
- Ignoring damaged battens: Cracked or rotted battens need professional attention
- Mismatched replacement tiles: Ensure new tiles match the profile, colour, and age of existing tiles
- Working in poor conditions: Never attempt to remove roof tiles on wet, icy, or windy days
- Using wrong tools: Using inappropriate tools can damage tiles – invest in proper roof tile removal tools
When not to DIY
Some situations require professional expertise:
- Steep roofs (over 20° pitch) or second-storey work
- Fragile terracotta tiles that may break easily
- Widespread damage affecting multiple tiles
- Suspected asbestos in older roof materials
- Water ingress that suggests structural damage
- Valley or ridge tiles that require specialist knowledge
- Metal roof applications which have different requirements
Professional roofers have the right equipment, insurance, and expertise to handle complex roof repairs safely. They can also identify underlying issues that might not be obvious to homeowners.
🏠 Based on the Mornington Peninsula?
We repair and replace single tiles through to full roof restorations. Our licensed roofers can handle any tile type safely and efficiently, with a warranty on all work.
Costs and timing
DIY costs: If you already have basic tools, you're mainly paying for the replacement tile ($5-$50 depending on type) plus any sealant or fixings.
Professional costs: A single tile replacement typically costs $150-$300 in Australia, including call-out, labour, and materials. This might seem expensive for a small job, but professionals can complete the work quickly and safely with proper insurance coverage.
Timing: For an experienced DIYer, replacing a single tile takes 30-60 minutes including safety setup. Professionals can often complete the job in 15-30 minutes once on-site.
Why early fixes save money: A single damaged tile can lead to water ingress, which may cause damage to ceiling plaster, insulation, electrical systems, or structural timber. What starts as a $20 tile replacement can become a $2,000+ repair if left unattended.
Related roofing services
If you're dealing with roof tile issues, you might also be interested in:
- Professional roof repairs for complex or extensive damage
- Roof restoration if multiple tiles need attention
- Re-roofing services for roofs with widespread issues
- Roof painting costs to refresh your roof's appearance
- Colorbond vs roof tiles if you're considering replacement options
Frequently asked questions
How do I know a tile needs replacing?
Look for visible cracks, missing pieces, loose tiles that rattle in wind, water stains on ceilings below, or tiles that have slipped out of position. Storm damage may also require tile replacement even if damage isn't immediately visible.
Can I walk on terracotta tiles?
Terracotta tiles are more fragile than concrete tiles. Avoid walking on tile pans and only step on the ribs near the battens. Consider calling professionals for terracotta work as they break easily and can be expensive to replace.
Do I need to re-seal after replacing a tile?
Only seal where specifically required and avoid blocking natural drainage paths. Most modern tiles interlock properly without additional sealing when correctly installed. Over-sealing can actually cause problems by preventing proper water flow.
What if the batten is damaged?
Damaged battens require professional repair as they support the roof structure. This involves removing multiple tiles and may require structural work. Contact a licensed roofer immediately if you discover batten damage.
How long does a single-tile replacement take?
For an experienced DIYer, replacing a single tile typically takes 30-60 minutes including safety setup. However, allow more time for your first attempt and factor in travel time to purchase replacement tiles that match your existing roof.
What roof tile removal tool do I need?
The essential roof tile removal tools are a flat pry bar (about 30cm), timber wedges for lifting roof tiles, and optionally a dedicated tile lifting tool. You'll also need safety equipment including a secure ladder, non-slip shoes, and work gloves. Professional roofers use specialised tools, but these basic items work for most DIY roof tile removal jobs.
How do I remove roof tiles without breaking them?
To remove roof tiles without damage: first lift the overlapping tiles using a timber wedge, then use a flat pry bar to gently disengage the target tile. Always work slowly when lifting roof tiles, and slide tiles towards the ridge before lifting out. Avoid forcing tiles – if they won't move, there may be hidden fixings that need releasing first.
Remember: While it's possible to remove and replace a single roof tile as a DIY project, working at height always carries risks. When in doubt, contact a professional roofing contractor who has the proper equipment, insurance, and expertise to complete the job safely.