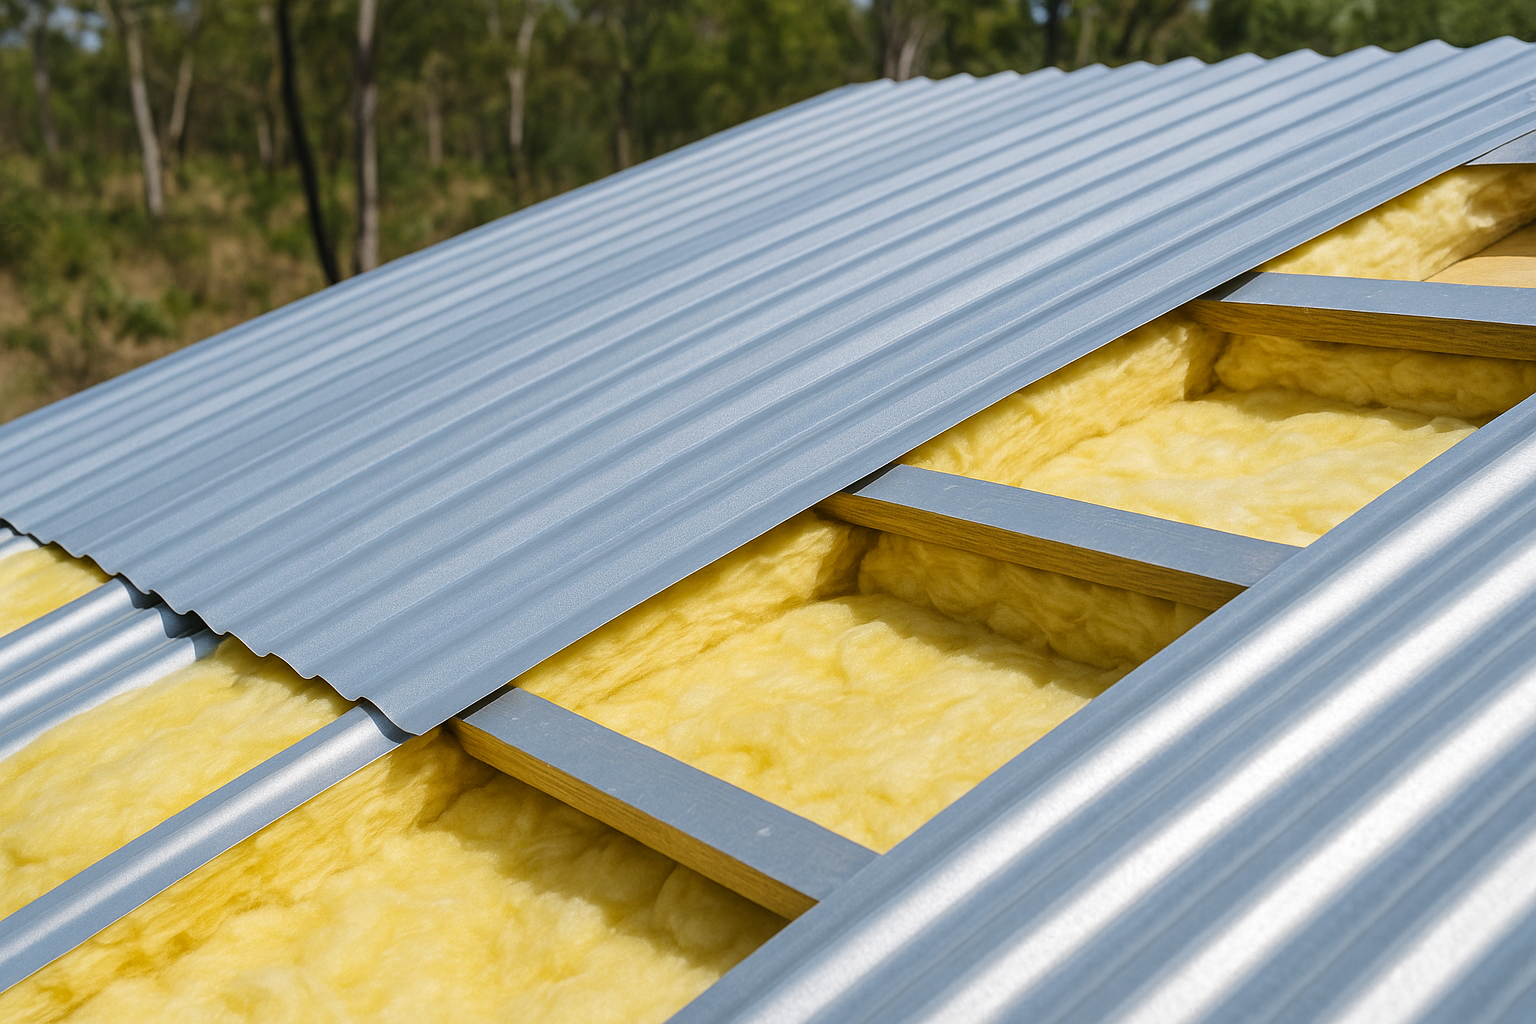
Installing insulation under metal roofing dramatically improves your home's comfort year-round—reducing summer heat gain, preventing winter chill, and eliminating condensation problems that plague uninsulated metal roofs. While it requires careful planning and safety precautions, many Aussie homeowners can tackle this project successfully.
This guide covers everything from choosing the right materials to proper installation techniques, helping you achieve professional results while understanding when it's best to call in professional roof restoration specialists for complex situations.
Contents
Can You Insulate Under an Existing Metal Roof?
Yes, you can insulate under existing metal roofing, but the approach depends on your roof design and access. There are two main installation methods:
From Above (During Re-roofing)
This is the gold standard approach, typically done during roof restoration or replacement. Insulation is installed as sheets are lifted, ensuring perfect coverage and professional results. This method provides:
- Complete access for proper installation
- Optimal positioning and air gaps
- Professional sealing of all penetrations
- Integration with new roof repairs if needed
From Below (Retrofit Installation)
Working from inside the roof cavity is possible but more challenging. Success depends on:
- Adequate ceiling access and headroom
- Purlin spacing that allows installation
- Roof pitch that's manageable for working safely
- No excessive moisture or structural issues
⚠️ Safety First
Working at height and in confined roof spaces presents serious risks. For steep roofs, multi-storey homes, or if you're uncomfortable with heights, consider hiring licensed roofing professionals who have proper safety equipment, insurance, and experience with complex installations.
What You'll Need (Tools & Materials)
Essential Tools
| Tool | Purpose | Notes |
|---|---|---|
| Measuring tape | Accurate measurements | 8m+ recommended for roof spans |
| Utility knife | Cutting insulation | Sharp blades essential |
| Straight edge | Clean cuts | 1.2m aluminium ruler ideal |
| Staple gun | Fixing insulation | Heavy-duty, 10mm+ staples |
| Foil fasteners | Alternative fixing | Purpose-made clips |
Safety Equipment
- P2 dust mask: Essential for glasswool handling
- Safety glasses: Protect from fibres and debris
- Work gloves: Prevent cuts and irritation
- Long sleeves: Cover exposed skin
- Non-slip footwear: Roof cavity safety
- Torch/headlamp: Adequate lighting
Insulation Materials for Australian Conditions
Foil-faced Glasswool (Anticon Blanket) – Most Popular Choice
- Combines thermal, acoustic, and condensation control
- Available in R1.5, R1.8, and R2.5 ratings
- Foil backing acts as vapour barrier
- Typical thickness: 50-90mm
- Best for: Most metal roof situations
Reflective Sarking with Air Gap
- Lightweight foil laminate
- Requires 25-40mm air gap both sides
- Excellent radiant heat reflection
- Best for: Hot climates, simple installations
Rigid Foam Boards (Polyiso/XPS)
- High R-value per thickness
- Good for limited space situations
- Requires careful detailing around penetrations
- Best for: Space-constrained applications
Australian Compliance Notes
- NCC Requirements: New builds and major renovations must meet energy efficiency provisions
- Standards: Products should comply with AS/NZS 4859.1 for thermal performance
- Installation: Follow manufacturer fixing guides for warranty compliance
- Building Codes: Some council areas have specific requirements
Planning & Safety
Pre-Installation Checklist
Before You Start
- Check weather forecast - avoid wet or windy days
- Ensure roof cavity access is adequate and safe
- Identify all electrical cables and services
- Locate downlights and flue penetrations
- Turn off electricity to roof cavity areas
- Remove or secure any stored items
- Check for asbestos in older homes (pre-1990)
- Notify household members of work in progress
Critical Safety Clearances
- Downlights: Minimum 200mm clearance all around, use approved heat shields
- Flues and chimneys: Maintain manufacturer-specified clearances (typically 50-200mm)
- Electrical cables: Never compress insulation around wiring
- Exhaust fans: Ensure adequate airflow paths remain clear
Fall Protection and Ladder Safety
- Use proper ladder setup (1:4 ratio, secure at top and bottom)
- Consider roof anchors for steep pitches
- Work with a spotter when possible
- Avoid working alone in roof cavities
- Be aware of sharp roof sheet edges
Step-by-Step: How to Install Insulation Under Metal Roofing
Measure & Plan Coverage
Measure roof spans between purlins and calculate total coverage needed. Allow for 150-200mm overlaps at joins and 50-100mm extra at eaves and ridge. Create a cutting plan to minimise waste and ensure you have adequate material.
Pro tip: Order 10% extra material to account for cuts, mistakes, and future repairs.
Prepare the Area
Clean debris from roof cavity and remove any old insulation materials. Check for and repair any roof leaks before installing new insulation—wet insulation loses effectiveness and can create mould problems.
Important: Ensure area is completely dry before proceeding.
Cut Pieces to Length
Using sharp utility knife and straight edge, cut insulation to required lengths. For foil-faced products, cut from the foil side to prevent tearing. Allow for slight sag (10-20mm) which improves thermal performance.
Safety note: Always wear dust mask and protective clothing when cutting glasswool products.
Position First Run
Start at eaves (lowest point) and work upward. Position insulation with foil face toward the warm side (usually down toward living spaces). Ensure proper sag between purlins—don't stretch taut.
Key point: Maintain air gaps as specified by manufacturer (typically 25-40mm from roof sheet).
Fix Insulation in Place
Secure using staples every 300-450mm along purlins, or use purpose-made foil fasteners. For batten-compressed systems, ensure battens don't over-compress the insulation. Maintain consistent support across entire surface.
Critical: Don't staple through foil vapour barrier except at designated fixing points.
Seal Joins & Penetrations
Use foil tape to seal all joins between insulation sheets, overlapping by at least 50mm. Around penetrations like flues, cut relief cuts and seal with neutral-cure silicone, maintaining required clearances.
Condensation control: Complete vapour barrier is essential—seal every gap and join.
Continue Across the Roof
Install subsequent runs maintaining consistent 150mm overlaps and proper air gaps. Work systematically to avoid missing areas. Pay special attention to valleys, hips, and ridge areas where complex cuts may be required.
Final Inspection
Check for continuous vapour layer with all seams properly taped. Verify drainage paths remain unblocked and roof ventilation isn't compromised. Confirm all safety clearances around heat sources are maintained.
Quality check: No gaps, no compression, no blocked vents.
Costs & Timeframes (Quick Guide)
| Roof Size | DIY Time | Professional Time | Material Cost Range (AUD) |
|---|---|---|---|
| Small (100-150m²) | 1-2 days | 1 day | $400-800 |
| Medium (150-250m²) | 2-3 days | 1-2 days | $600-1,200 |
| Large (250m²+) | 3-5 days | 2-3 days | $1,000-2,000+ |
Additional Costs to Consider:
- Foil tape and sealants: $50-150
- Safety equipment rental: $100-300
- Professional installation: $15-25/m² labour
- Building permits (if required): $200-800
Not Sure About DIY?
Get professional advice on the best insulation approach for your specific roof and conditions.
Get a Fast Quote 03 4152 7766Common Mistakes to Avoid
❌ Critical Installation Errors
- No air gap with reflective sarking: Reduces effectiveness by up to 80%
- Gaps in vapour barrier: Allows condensation and heat transfer
- Compressing glasswool insulation: Destroys thermal performance
- Bridging over purlins: Creates thermal bridges that bypass insulation
- Blocking ventilation: Can cause moisture problems and reduce roof life
- Ignoring clearances: Fire hazard around downlights and flues
- Poor fixing: Insulation sags and gaps develop over time
- Wrong orientation: Foil side must face warm side for vapour control
Installation Quality Tips
- Take photos during installation to document proper coverage
- Use quality foil tape—cheap tape fails quickly
- Don't rush the sealing process—it's critical for performance
- Check manufacturer warranties—poor installation can void coverage
- Consider integrated systems that combine multiple functions
When to Call a Professional
While many homeowners can successfully install under-roof insulation, certain situations require professional expertise:
Definitely Call Professionals For:
- Steep roofs: Pitches over 30° are dangerous for inexperienced workers
- Multi-storey homes: Fall risks and access challenges
- Rusted or damaged fixings: May need structural assessment
- Existing moisture issues: Staining or mould indicates bigger problems
- Complex roof geometry: Multiple valleys, dormers, or unusual shapes
- Asbestos concerns: Homes built before 1990
- Commercial properties: Different standards and regulations apply
Benefits of Professional Installation
- Proper safety equipment and insurance coverage
- Experience with complex detailing and penetrations
- Knowledge of building codes and compliance requirements
- Warranty on workmanship and materials
- Efficient completion with minimal disruption
- Access to trade-quality materials
You Might Also Like
If you're considering roof insulation, you might find these related guides helpful:
- How Long Does It Take to Build a Pergola? - Planning outdoor structure projects
- How to Remove a Roof Tile (Safely) - Basic roof maintenance skills
Frequently Asked Questions
How do you install insulation under existing metal roofing?
Install from below via roof cavity if access permits. Measure and cut foil-faced glasswool to fit between purlins, staple or clip in place with foil side toward warm side, seal all joins with foil tape, and maintain required air gaps. For steep or difficult roofs, professional installation is recommended.
Do you insulate under a metal roof in Australia?
Yes, under-roof insulation is highly recommended in Australia for thermal comfort, condensation control, and noise reduction. It's required by NCC energy efficiency provisions for new builds and major renovations. Foil-faced glasswool (anticon) or reflective sarking with air gaps are common solutions.
What is roof sarking and do I need an air gap?
Roof sarking is reflective foil laminate that reduces radiant heat transfer. Most sarking products require a 25-40mm air gap on both sides to function properly. Check manufacturer specifications—some integrated products combine sarking with bulk insulation and have different air gap requirements.
What's the best insulation under Colorbond?
Foil-faced glasswool blankets (anticon) are ideal under Colorbond, providing thermal, acoustic, and condensation benefits. Choose R1.5-R2.5 for most climates. Ensure foil face is oriented toward the warm side and all seams are sealed with foil tape for optimal performance.
Can under-roof insulation reduce rain noise?
Yes, bulk insulation like glasswool blankets significantly reduce rain noise on metal roofs. The thicker the insulation, the better the acoustic performance. Foil-faced products also help with thermal control and condensation prevention simultaneously.
Properly installed insulation under metal roofing transforms your home's comfort and energy efficiency while protecting against condensation damage. Whether you tackle this as a DIY project or hire professionals, understanding these principles ensures you get the best results for your investment.
Ready to Upgrade Your Roof Insulation?
Get professional advice on the best insulation solution for your Mornington Peninsula home's specific needs and conditions.
Get a Fast Quote 03 4152 7766Last updated: September 25, 2025